Showing posts with label home. Show all posts

December 29, 2013

Christmas Cheer ~ Tablescape

So our posts have been few and far between once again. I'm hoping I can stick to a bit more of a regular schedule in the new year. Don't hold me to it though! 

We hosted a dinner over the holidays again this year. D's Mom had gifted us the vintage green and gold tumblers shortly after last Christmas and I had vowed I would incorporate them in this year's table setting.

All other items are pieces we had on hand around the house. The 'holiday sweets' cupcake toppers have been floating around the baking cupboard for a few years now and green candle holders were recycled from my sisters summer wedding. (I promise that post is coming soon!)


We hope everyone had a wonderful relaxing time over the holidays, filled with yummy treats and lots of love!

January 1, 2013

Holiday Recap

We hope everyone had a relaxing, enjoyable Christmas filled with love, laughter, friends and family.

The new house called for new traditions along with hosting family dinners. In fact we had both sides of the family over for a holiday dinner. We have had family over for dinner in the past but this time it was in our new home, cooking on our 1950's stove and accommodating 8-11 people in our dining room. Everything went well and we are happy to have our first holiday season of entertaining guests under our belts.

Christmas Table ~Take 1.

Our first gathering was on Christmas Eve eve with D's family. We were able to fit 11 people, with room to spare in our dining room, which I thought was quite an accomplishment. D prepared dinner with me nervously standing around pretending like I knew what was going on, every time he left the kitchen area to show a newly arrived guest around the house. I have to be honest and tell you I have only turned on our stove a handful of times since being in the house! Cooking is definitely D's department.


My parents came to stay the night on Christmas Eve. It was an enjoyable evening of taking a wintery stroll, preparing last minute presents and all sitting down to watch the movie 'Elf'. My Mum took over cooking Christmas dinner and I did my part by cleaning up and washing dishes through out the day.

Christmas Table ~Take 2.
All in all our holidays were filled with snow...


Cozy days at home.....
(we painted our dining grey a few days before Xmas)


Being spoiled with gifts.....


Watching our kitty mess up the tree skirt a few times a day.....


It's a good job she is so cute....


And taking the time to be a couch potato here and there.....


And we are already looking forward to doing it all again next year.

Happy 2013....May your year be filled with silliness, love and new adventures!


December 6, 2012

Christmas Lights & Crows

D and I spent last Sunday afternoon putting up Christmas lights at 9808. He wanted me to document the task as it was our inaugural house lighting Xmas event.

We had quite a discussion about what type of lights we were going to use. I am pro all white lights (I think they look very classy) and D is pro multi coloured lights (he says they are the true Christmas light). I was initially going to try and stand my ground on the white lights but I am also very anti-LED bulbs. Even though they are the better option energy wise and the way of the future, I really don't like the look of them and they kind of hurt my eyes. So after much debate we decided to come to a compromise and go with the old school (energy guzzling) multi coloured Santa-Lites (yes they still sell them).  I didn't get stuck having to stare at LED's and D got his coloured bulbs.

D did most of the work whilst I did a lot of standing at the bottom of the ladder handing up plastic clips.

We bought 5 strings of 25 bulbs each which ended up covering 3 sides of the bungalow. It's a modest start but we plan on adding a few more strings each year. I would love to wrap the front porch, dormer window and possibly even Mr. Roboto, our Japanese Maple next year.

I also suggested that maybe we could switch out the lights to the all white option every other year. One year D gets what he wants and the next year I do ;) An added expense I know, but a gal can dream.


The front of the house is slowly improving but we still have a long way to go. Looking at this photo reminds me that we really must get on taking down the satellite dish and the air conditioning platform from the side of the house. Also the pile of asphalt from the driveway hanging out on the lawn isn't aesthetically pleasing either.

We were almost at the end of hanging the last strand when literally dozens of crows decided to have a crow convention above our house. I would estimate there was at least 100 of them. The experience was quite spectacular. The dark rain clouds made it quite ominous and the sound of 100 crows cawing at the same time was incredibly loud and pretty intense.


After a few minutes they calmed down and a bunch of them hung out in our tree for a while.


November 28, 2012

DIY ~ Crayon Art

A while back I mentioned  I was going to be trying out 3 different DIY art projects that I have seen floating around Pinterest lately. The first piece I made was Tape Art using a Dollar Store white canvas and some black hockey tape I had in my gear bag.

Read all about it here.

Next up.....

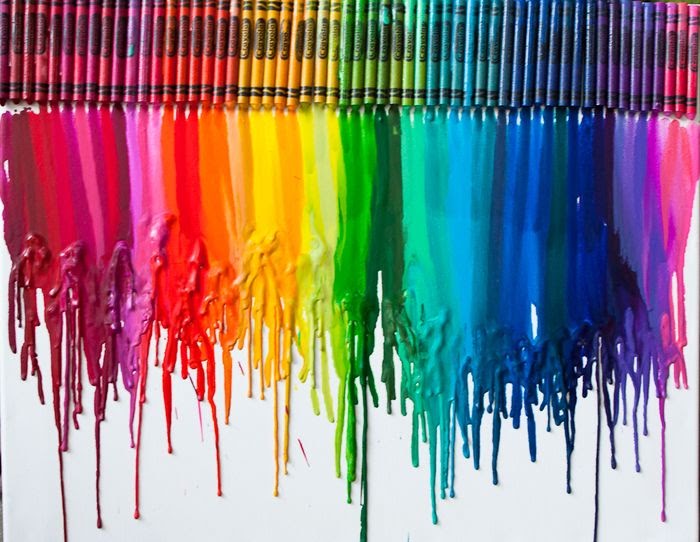
Second Piece: Abstract Art Using Melted Crayons

Crayon art is super popular right now. You may have seen this tried and true classic in your Pinterest travels......

Unknown Source
 
 Or possibly the classic version with a twist.....

Flickr

Whilst browsing through the many bright colourful creations that are out there I found these pieces done by Jenna Brown and her hubby. Check out her blog post here.


Jenna Brown
It's a different spin on the classic by using the crayons as paint instead of taping them to the top and letting the wax melt down the canvas.

I picked up a 2 pack of canvases from Walmart so I also decided to get D in on this art project as well.
Crayola crayons produce intense bright colours when melted and are extremely workable. I have read that you must use the Crayola brand. The no name brands don't melt as easily and end up glumping together in a hot mess.

I'd already taken a crack at a melted crayon piece a couple of weeks ago and though I liked the outcome and think it's pretty, it didn't turn out exactly how I had envisioned.


First Attempt (Lisa)


It reminds me of outer space.
To get this affect I started out with one colour (I think it was black) and held the crayon a couple of inches away from the canvas. Then I used my heat gun (we don't have a hair dryer) to melt the crayon whilst turning it slowly. The melted crayon will start to splatter on the canvas. The more you angle your heat source the more splatter you get. This can get messy so make sure you cover your work area well.  Next I added some teal, then grey and finally white. All using the same method as above.

My original intention was to keep the background mostly white and to add small bursts of sporatic colour.

The downside is the more colour and crayon you add, the more the other colours on the canvas continue to melt and move around which makes it hard to keep whats already on the canvas in the same spot. The upside is throughout the whole process your work of art is constantly changing.

Second Attempt (Lisa)


I had a very set plan going into this one and just wanted to use one colour. Unfortunately I only had about a third of a crayon left in said colour so I didn't get as much colour on the canvas as I would have liked but it is definitely closer to my original desired affect.


I love how the melted crayon produces an ink like affect and that the texture of the canvas shows through in the lighter areas.


First Attempt (D)


D's method was to use the crayon as a paintbrush. He initially started painting line with the melted crayon but as I mentioned above, things change pretty quick once the colours start flowing into each other.

The other possible downside of using melted crayons to make art is it is hard to know when to stop and call the piece done.

D came to a point where he was done. The piece looked even more like flowers than it does now. Then we decided to cover the edges with melted crayon to give the canvas a more finished look. Unfortunately the crayon started to drip onto the front so we had shoot it with more heat to get rid of the runs. This in turn changed the original finished look of the piece slightly but it still looked amazing.

After this D was totally done and went off to watch a re-run of The Office. I on the other hand thought there was one corner that needed to bit more colour.... So I tried to add a bit more but as I said before the more heat you shoot at the wax already on the canvas, the more it re-melts and continues to move around and mix with the other colours. I felt like I had kinda wrecked the one corner I was trying to fix so naturally I continued to 'fix' D's art...

Long story short it turned out looking like above which isn't really how it looked when D was done with it. It is still totally awesome but not how it was supposed to be.

Moral of the story.....once you think your piece is done STOP and put down the heat gun! AND don't mess with other people's art projects. My bad.

That being said I am totally addicted to this type of art and have some ideas for more pieces I would like to try. So there will probably be a Crayon Art Part 2 post coming soon!


D's is my favorite! It has been moved from upstairs and is now hanging proudly in our bedroom. I think it looks like a watercolour flower masterpiece.


November 21, 2012

Overdue Update~Saturdays In November

It's been just over a month since I have shared anything here at 9808. Gah time travels so fast!!

That is not to say nothing has been getting done on the home front though.

One of the reasons for the sound of crickets around here is I was really starting to get frustrated with our current little point and shoot camera and my photography skills (or lack there of I should say). With winter approaching and the days getting shorter our time spent at home during daylight hours has been becoming less and less. The weekends now seem to be the only time to attempt to take half decent photos. 

D works on Saturdays so the day has become my time to get up early and spend the 8 hours alone tackling small projects around the house. I get so involved with what I'm doing, it's usually by the end of the day after dark that I realize I forgot to take any photos to show you what has been going on. Sundays are then spent working on house projects together and then of course forgetting to document the progress once again. 
So I used the above as an excuse to buy a new Nikon SLR! Makes sense right? We used to have an older model Nikon so we just went with what we were already comfortable with. What it really does is motivates me to spend the time to take better quality photos of our bungalow progress and also forces me to take the time and learn to use the camera and its functions properly. 

With that all said, here are a mix of a few things that have been happening on Saturdays around here this past month. 

This adorable owl planter was picked up from the thrift store for $3.99. He was a pretty hideous yellow colour and has a small chip on his left foot. I primed him and then gave him a couple of coats of white spray paint. Now he is proudly sporting a full head of greenery on our stereo cabinet in the dining room.


Started to paint the main floor. First up was the hallway. The colour is Raindrops by CIL.


Made wooden stars out of recycled wood from the random fence panel that used to be in the front yard. More on this later.


Decorated for the fall season.


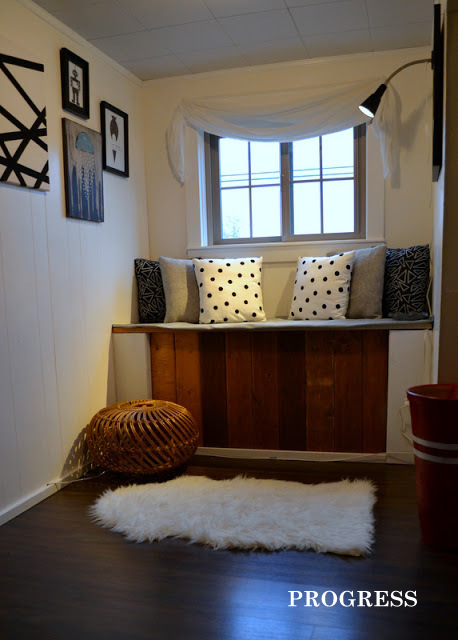
And continued working on the window seat area. There is still work to be done. Things need to be moved around, the window bench needs to be upholstered with the grey fabric, and  more art needs to be hung on the walls, but this definitely gives you an idea of the final outcome.


And a before photo.....


More updates coming soon!

August 17, 2012

To Ikea Or Not To Ikea

Folks either love Ikea and their products or vow to never step foot in an Ikea store claiming their products are cheaply made and mass produced.

I personally would rather spend my money on a found vintage piece of furniture over buying bigger items from Ikea but definitely feel Ikea is a great place to buy the small everyday items such as drinking glasses, candles, plants, bath accessories, cutlery, the list goes on. I am also drawn to Ikea's clean, simple, Scandinavian style.

I must admit I was pretty darn excited to come home from work the other day to find the new 2013 Ikea Catalogue on my doorstep.


I immediately made myself a cup of tea and set out to study the catalogue page by page. This year Ikea is focusing on the use of textiles and how small changes such as introducing a few new throw pillows or DIYing some new window coverings can add new life to rooms and old pieces of furniture you already own around the home. The main concept of the catalogue though is Ideas. I was impressed to read this excerpt in the first couple of pages......

"You don't have to buy a single thing to bring new life to a room. Start with what you have, then apply a fresh eye and a few spare minutes. Move a sofa to a new spot. Swap curtains. Borrow a rug from another room. It doesn't have to cost anything. It's about ideas."

Of course the catalogue is full of inspiring photos and product shots and consumers will still be snatching up these fair priced goodies, but it's nice to be given the option and to be encouraged to decorate your home with what you already have.

I would say this is Ikea's best year for textiles and fabrics by the metre. They have increased their textile lines, introduced new designers, and their cut fabrics are cheaper than ever before.


The 2013 textiles are made up of a mix of bright, bold, soft florals, nature inspired and classic black and white patterns that can appeal to wide range of design aesthetics.

Of course being the black and white lover that I am, my favorite textiles are the ones of this nature. Launched on June 1, 2012 the MYRLILJA line is a new limited addition textile line, only available while supplies last. The cushions below would add a playful contemporary touch to any room in the house.


Some other favorite fabrics from this year......


SARALISA $7.99/metre


TRÅDKLÖVER $5.99/metre


IKEA STOCKHOLM BLAD $7.99/metre


CECILIA $2.99/metre


The 2013 Ikea catalogue will definitely join my stack of catalogues on the bookshelf from years gone by after it has spent some more time on my bedside table mind you.

I found an easy DIY project over at Poppytalk using the new GURINE fabric to make fun leaf pillows. Simply cut out the different leaf shapes, sew together and stuff. These would be super cute in a child's room, add some whimsy to your patio chairs, or bring the nature indoors up at the cabin.  Ikea has also introduced fabric designed to be coloured in using fabric paint. This would be a great DIY project to do with the kids, helping them make their own personalized pillows for their beds.


Another discovery I have recently stumbled upon is Ikea's Swedish blog Livet Hemma, Life at Home. The blog is full of inspirational pics, ideas, DIY projects and recipes. The blog is in Swedish but can be switched to English by using the Google Translate button at the top of the page.


Check it out!